
Hi everyone,
In this article, I will share with you how to build an admin dashboard using Golang and React Admin.
It's very easy to implement and very helpful for Gophers.
Let's get started.
Why should build an admin dashboard?
Based on my experience, it is essential for every project to develop an admin dashboard. It can offer several advantages, such as:
- Serving as a centralized platform for managing data, configuring settings, and updating information as required.
- Playing a crucial role in ensuring security by implementing permissions that control access to the tool.
- The admin dashboard allows for the deployment of dashboards, enabling visibility and monitoring of the system.
How to setup:
In this tutorial, we will explore the process of building an admin dashboard using Golang as the backend and React Admin as the frontend. We will cover the following key topics:
- Setting up the backend and frontend environments
- Running both components together on a single port
- Deploying the admin dashboard using Docker
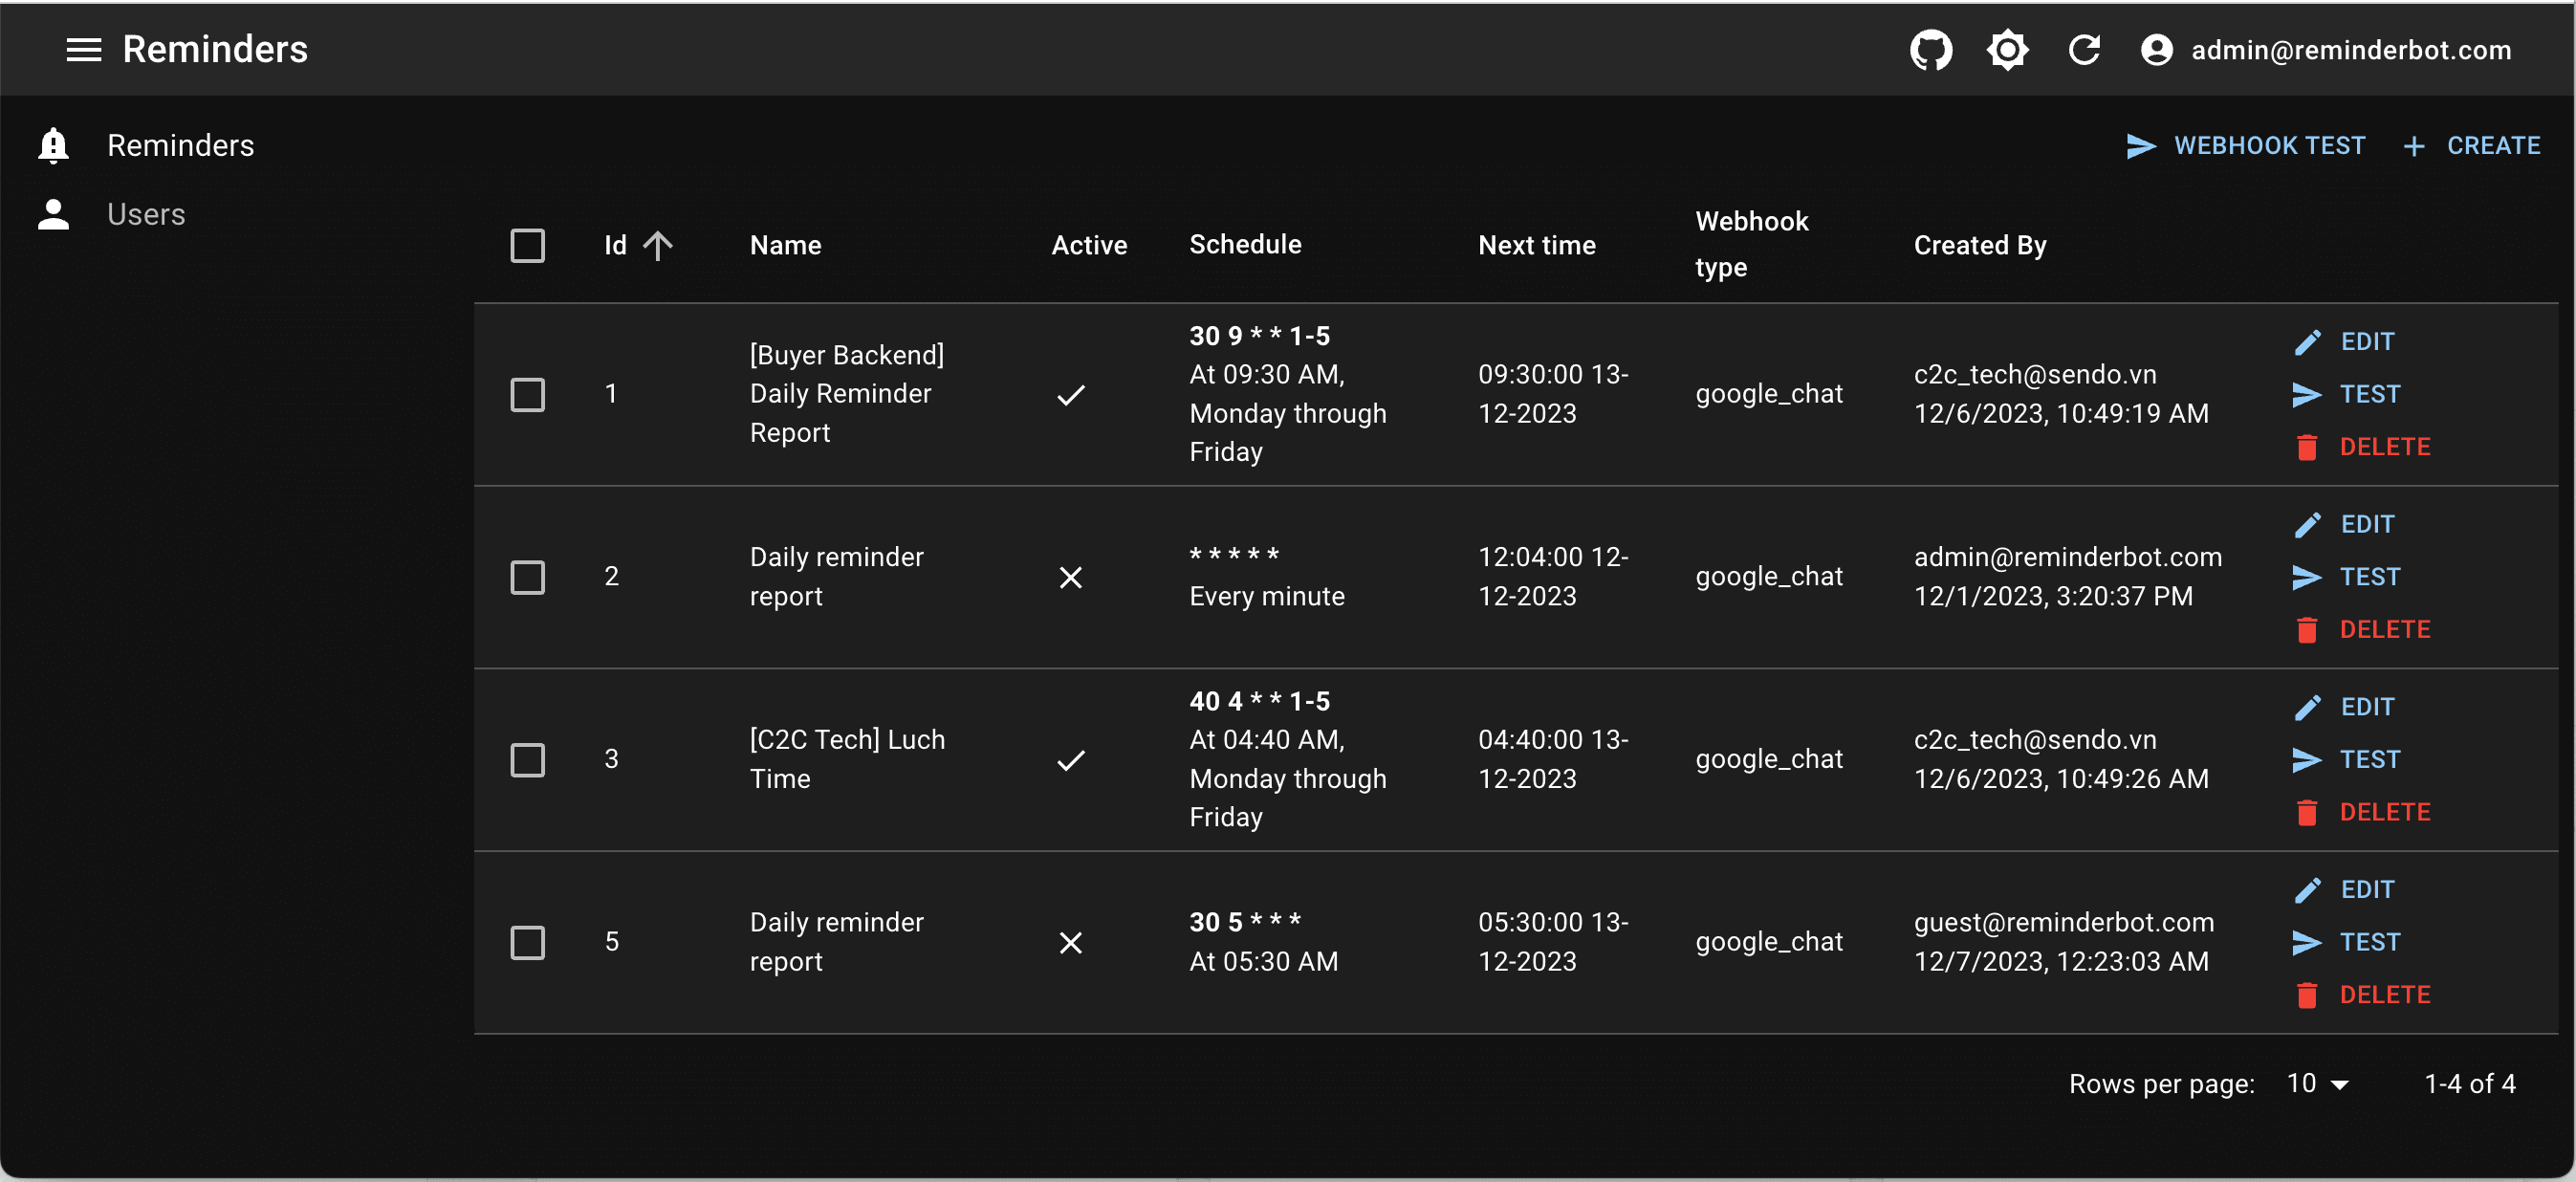
You can refer to the demo here.
And get more details of the source code at the end of the post.
1. Setup the Backend and Create a REST API:
Begin by setting up the backend using Golang. Consider functionalities like user management, data handling, and authentication.
To set up the backend for your admin dashboard using Golang, you can follow these steps:
1.1 Install Golang and Create a New Project
If you haven't already done so, start by installing Golang on your machine.
Set up a new directory for your backend project. Use the go mod init command to initialize a new Go module for your project. This will create a go.mod file that will manage your project's dependencies.
1.2 Define Dependencies and Implement the Backend Logic
Next, you'll need to define the dependencies for your project. Open the go.mod file and add the required packages or libraries that you'll be using in your backend.
For example, we are going to build an admin dashboard to manage users.
The dependencies we using:
- uber/fx: use as dependency injection
- gin-gonic: web framework to simplify the routing and request handling process
- gorm: simplify database operations by providing a convenient and developer-friendly way to interact with relational databases.
- sqlite: driver to connect sqlite3 Database
Start implementing the backend logic for your admin dashboard. Define the necessary routes, handlers, and functions to handle different requests and operations.
Example: implement router.go
// /server/router.go
package server
...
func (s router) Register(g gin.IRouter) {
	h := s.handler
	r := g.Group("/api/v1")
	r.POST("/auth/authenticate", h.Authenticate)
	userG := r.Group("/users", s.authMdw)
	{
		userG.GET("", h.findUsers)
		userG.GET("/:id", h.getOneUser)
		userG.POST("", h.createUser)
		userG.PUT("/:id", h.updateUser)
		userG.DELETE("/:id", h.deleteUser)
	}
}
Example for implementing handler.go
// /pkg/user/storage.go
package server
...

func (h Handler) getOneUser(c *gin.Context) {
	idStr := c.Param("id")
	id, _ := strconv.ParseInt(idStr, 10, 64)
	user, err := h.userStorage.GetOne(c, id)
	if err != nil {
		_ = c.AbortWithError(http.StatusInternalServerError, err)
		return
	}
	u, _ := ExtractUserFromCtx(c)
	c.JSON(http.StatusOK, transformUserFromUserDB(user, u.ID))
}
...
With a layer to connect directly to the database, we have a User Storage implementation like this:
// /pkg/user/storage.go
type User struct {
	gorm.Model
	Username  string        `json:"username" gorm:"username"`
	...
}

type storage struct {
	db *gorm.DB
}

func (t *storage) GetByUsername(ctx context.Context, email string) (user User, err error) {
	err = t.db.WithContext(ctx).Where(&User{
		Username: email,
	}).First(&user).Error
	if errors.Is(err, gorm.ErrRecordNotFound) {
		err = ErrNotFound
	}
	return
}
...
1.3 Connect to a Database
If your admin dashboard requires data storage, you'll need to connect to a database. Choose a suitable database system like MySQL, PostgreSQL, or MongoDB, and install the corresponding Go package to interact with it.
For example, we use sqlite as data storage.
const dbFileName = "./tmp/go-admin.db"

func InitSQLiteDB() (*gorm.DB, error) {
	db, err := gorm.Open(sqlite.Open(dbFileName), &gorm.Config{})
	if err != nil {
		return nil, err
	}
	return db, nil
}
...
1.4 Test and Run the Backend:
Let's complete your backend side with the main file:
package main
...
func main() {
	app := fx.New(
		di.Module,
		fx.Invoke(startAdminServer),
	)
	app.Run()
	return nil
}

func serveStaticFile(g *gin.Engine) {
	g.Static("/admin", "./webs/dist")
}

func startAdminServer(lc fx.Lifecycle, router server.Router) {
	g := gin.Default()
	serveStaticFile(g)
	router.Register(g)
	lc.Append(fx.Hook{
		OnStart: func(ctx context.Context) error {
			go g.Run(":2303" )
			return nil
		},
		OnStop: func(ctx context.Context) error {
			return nil
		},
	})
}
Once you've implemented the initial backend logic, you can test it by running your application.
go run main.go
The server will run as follows:
[GIN-debug] GET    /admin/*filepath          --> github.com/gin-gonic/gin.(*RouterGroup).createStaticHandler.func1 (3 handlers)
[GIN-debug] HEAD   /admin/*filepath          --> github.com/gin-gonic/gin.(*RouterGroup).createStaticHandler.func1 (3 handlers)
[GIN-debug] POST   /api/v1/auth/authenticate --> go-admin/server.Handler.Authenticate-fm (4 handlers)
[GIN-debug] GET    /api/v1/users             --> go-admin/server.Handler.findUsers-fm (5 handlers)
[GIN-debug] GET    /api/v1/users/:id         --> go-admin/server.Handler.getOneUser-fm (5 handlers)
[GIN-debug] POST   /api/v1/users             --> go-admin/server.Handler.createUser-fm (5 handlers)
[GIN-debug] PUT    /api/v1/users/:id         --> go-admin/server.Handler.updateUser-fm (5 handlers)
[GIN-debug] DELETE /api/v1/users/:id         --> go-admin/server.Handler.deleteUser-fm (5 handlers)
[GIN-debug] Listening and serving HTTP on :2303
[Fx] RUNNING
Make sure your backend starts without any errors and test the defined routes using tools like Postman or curl.
2. Set up the Frontend
Now, we will create a new folder /webs to manage Frontend source code
Install React Admin, a powerful frontend framework, using npm or yarn.
npm install react-admin
#or
yarn add react-admin
You can refer to the document of marmelab to learn quickly: How To Learn React Admin
We will configure app and User resource like this:
import {Admin, Resource,} from "react-admin";
...

export const App = () => (
    <Admin
        layout={CustomLayout}
        loginPage={Login}
        dataProvider={dataProvider}
        authProvider={authProvider}
        darkTheme={{palette: {mode: 'dark'}}}
    >
        <Resource
            name="users"
            icon={PersonIcon}
            {...Users}
        />
    </Admin>
);
Create User components: Create / Edit / List / Show.
import React from 'react'
...
const UserCreate = (props) => {
    return (
        <Create title='Create a User' {...props}>
            <SimpleForm>
                <TextInput source='username' required fullWidth/>
                <SelectInput choices={Roles} source='role'/>
                <BooleanInput source='is_active'/>
            </SimpleForm>
        </Create>
    )
}

export default UserCreate
---
...
const UserList = (props) => {
        <List {...props} >
            <Datagrid rowClick="show">
                <TextField source='id'/>
                <TextField source='username'/>
                <BooleanField source='is_active'/>
                <FunctionField
                    label="Role"
                    render={record => GetRole(record.role)}
                />;
                <WrapperField label="Created By">
                    <TextField source='created_by'/>
                    <br/>
                    <DateField source='created_at' showTime={true}/>
                </WrapperField>
                <EditButton/>
                <DeleteButton/>
            </Datagrid>
        </List>
    )
}

export default UserList
3. Configure the Data Provider
Connect React Admin to the Golang backend by configuring the data provider. Customize it to handle data retrieval and modification.
import {fetchUtils} from "react-admin"
...
export const API_HOST = import.meta.env.VITE_SIMPLE_REST_URL || '/api/v1'

const httpClient = (url, options = {}) => {
    const token = getToken();
    const user = { token: `Bearer ${token}`, authenticated: !!token };

    return fetchUtils.fetchJson(url, {...options, user});
};
export const dataProvider = simpleRestProvider(API_HOST, httpClient);
Take a look this line:
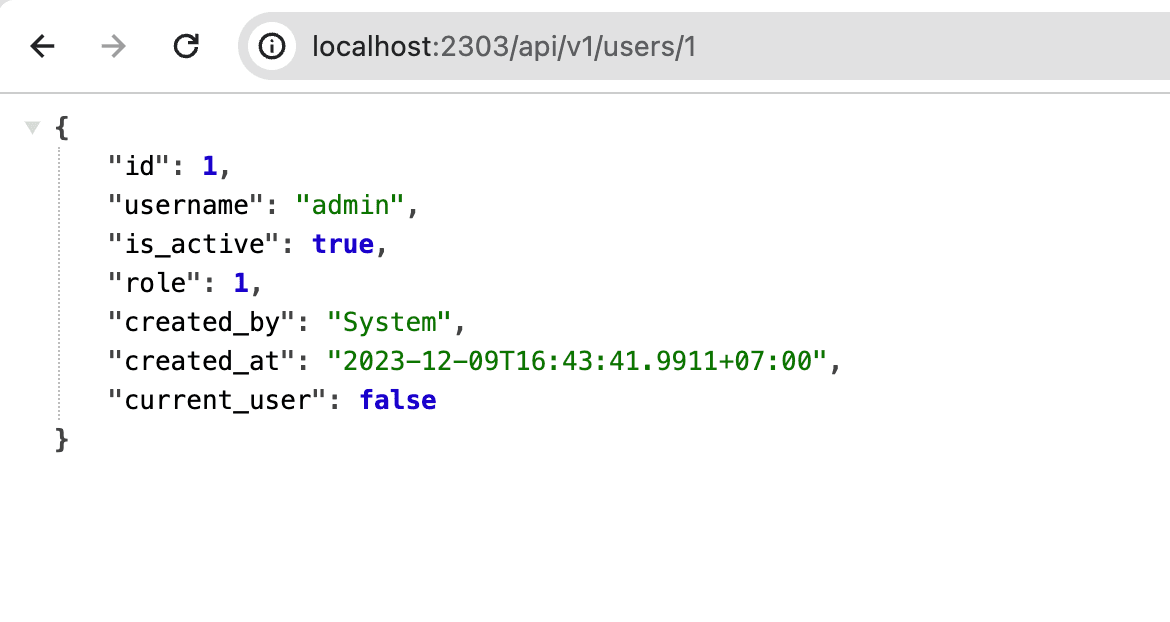
export const API_HOST = import.meta.env.VITE_SIMPLE_REST_URL || '/api/v1'
API_HOST will be assigned data from .env file with variable name: VITE_SIMPLE_REST_URL.
If you do not configure .env file, API_HOST will base on port that Web is listening.
Example: WebUI is running on port: 2303 => API_HOST will be localhost:2303/api/v1
4. Run and Deployment
How to run:
To run the admin dashboard, there are two different approaches you can take:
4.1. Running them independently:.
For the Golang Backend, execute the following command in your terminal:
go run main.go
This will start the server on port :2303.
For the React Admin Frontend, use either of the following commands:
npm run develop
#or
yarn develop
This will launch the web UI on port :3000.
4.2. Running both together on single Port:.
Running both the backend and frontend on a single port is a great approach that simplifies the deployment process. By doing so, you can access both the backend and frontend components through a single URL. To achieve this, follow these steps:
- Build the frontend as a static file: Before serving the frontend, you need to compile it into a static file format. This can be done using tools like webpack or create-react-app, depending on your frontend framework.
- Serve the static frontend file on a path in Gin: In your backend's source code, you will need to add the following line to serve the static frontend file on the desired path (in this case, "/admin"):
Let's proceed with the following steps:
Step 1: Build the Web Admin as a static file
To build the Web Admin as a static file, run the appropriate command in your terminal:
node run build
#or
yarn build
After the build process is complete, the static files will be saved in the /dist directory.
Step 2: Add code to serve the static file in the backend.
Now, you need to update the backend source code to serve the static files. Add the following code to serve the static files on a specific path:
func serveStaticFile(g *gin.Engine) {
	g.Static("/admin", "./webs/dist")
}
This line tells Gin to serve the static files located in the specified build directory ("./webs/dist") when the URL path matches "/admin".
Step 3: Run the backend server
After adding the code to serve the static file, you can now run the backend server. Execute the necessary command to start the backend server, and it will serve both the backend API and the frontend static files.
go run main.go
Cool! Now the Backend API will be exposed through the path /api/v1/ (e.g., http://localhost:2303/api/v1).
The Frontend will be served through the path /admin (e.g., http://localhost:2303/admin).

How to deploy:
There are various methods to deploy your service. In this article, I only share with you a way to deploy using Docker.
- Dockerfile:
Create a Dockerfile as follows: #v0.0.1 FROM node:latest AS admin RUN rm -rf ./webs/.cache RUN rm -rf ./webs/dist RUN rm -rf ./webs/node_modules COPY webs/package.json /admin/package.json COPY webs/yarn.lock /admin/yarn.lock WORKDIR /admin RUN yarn install ADD webs /admin RUN WPATH='/admin' yarn run build FROM golang:alpine AS builder #RUN apk add --no-cache git gcc g++ RUN apk add --no-cache git gcc g++ openssh-client build-base musl-dev ADD . /go/src WORKDIR /go/src RUN go mod download RUN CGO_ENABLED=1 GOOS=linux GOARCH=amd64 CGO_CFLAGS="-D_LARGEFILE64_SOURCE" go build -ldflags="-w -s -extldflags=-static" -o go-admin-example . FROM scratch WORKDIR /root/ COPY /etc/ssl/certs/ca-certificates.crt /etc/ssl/certs/ COPY /go/src . COPY /admin/dist ./webs/dist/ COPY /usr/local/go/lib/time/zoneinfo.zip /usr/local/go/lib/time/ EXPOSE 2303 CMD [ "./go-admin-example" ]
- Docker-compose:
Create docker-compose.yaml as bellow:
---
version: '3.5'
services:
  go-admin:
    image: go-admin-example:latest
    build:
      context: .
      dockerfile: ./Dockerfile
    container_name: "go-admin-example"
    ports:
      - "2303:2303"
Cool. Let's try running your service via Docker:
docker-compose up
Finally, push it to Docker Hub and run it anywhere you want.
You can refer to the source code here: go-admin-example
Summary:
In the end, I have introduced a tutorial on building an admin dashboard with Golang and React Admin.
I hope it proves to be helpful to you. If you have any questions, please don't hesitate to comment below.
